Showing posts with label derbi. Show all posts

Thursday, March 13, 2014

Derbi T.A.T. Build start and Derbi Piston port differences.

Soooo if you havent heard, a bunch of us are doing the Trans American Trail on Derbis.  The idea was thought up by Blk Blk Shawn L and its a pretty rad concept. The trail spans from Tennessee to Oregon and its mostly off road. Check out the site Here! and like or donate if you'd like, anything helps. Lots of rad dudes are working together to make this happen! This isnt limited only to Derbis but we thought it would be rad to all ride the same bikes and to coordinate tools and parts between us. If you want to join, that would be rad! 

So I tracked down a 1979 Derbi T.T. for my T.A.T. bike. It was completely seized and pretty shitty when I got it. What a better bike to destroy....right? 

Ive been doing some thinking and I can only afford to take a couple weeks off at the shop. So Im planning on just doing the trail up to Denver so the shop doesnt get too far behind. With all the discussion between us planning on going there are some very modified bikes in the works. My bike is going to be sort of an experiment/test of the stock components of a Derbi.  I am planning on riding a completely stock Derbi other than pipe, gearing, and frame mods. That means 12:12 Dellorto sha, stock top end, all the goodies! I am such a fan of stock bikes and I really feel like gas mileage is going to play a big part in this ride. The T.T. has a stock 1 gallon tank and I recently purchased a sweet Acerbis front fork tank that carries 1.3 gallons ($40 shipped ebay!). 


I need to convert the Acerbis tank from siphon fed to having a petcock, but that shouldnt be too hard.  So 2.3 gallons and a 12:12 should get me a ways down the trail. I just worry about people using kits and large carbs because we all know how off and on throttle kills mileage.  

Im rebuilding the engine right now and trying to salvage any stock parts possible. Got lots of ideas about this bike! Everyone is coming up with super rad ideas for their bikes, its inspiring.  Anyways stay tuned for some dumb offroad stock Derbi updates.

Next: DERBI ENGINESSS

Ive been wanting to posts pics of Derbi PP differences for a while. I finally have 2 piston port engines off bikes and next to each other.  As you may know some Derbis (Laguna Sport / RD-50 / C-5 Diablo) came with tubular cradle frames and some came with stamped step through frames (SLE / T.T. / SL). All of these models came with either piston port or pyramid reed engines depending on the year.
 Well the engines that came on the tube framed models have a few differences than the ones that came on the step through frames. The differences were for clearance and mounting issues, check these pics. 

Step through frame
 Engine uses 3 mounts, one top front, one top rear, and one bottom rear, just like how most traditional moped engines bolt up to a frame.
Tubular frame
Uses 3 mounts as well. one top rear, one bottom rear, and one bottom front. It's hard to see the bottom front with this photo. See how the top front mount isnt used and doesnt even come with motor mount bushing in it. If you used this engine on a step through frame, you would have to figure out a solution for the front motor mount bushing being absent. Also note how close the head fins are to the frame.
  
 Left: Step through PP engine. Right: Tube frame PP engine.
Look at the engine studs on this tubular frame style PP engine. They only stick 1 and 3/4 inches out of the case compared to the 4 inches the engine studs stick out of the step through style PP engine. It is designed this way so you can remove the head and cylinder with very little clearance room of the tubular frame. Food for thought for anyone experiencing clearance issues on a custom build. Also note the 2 bolts under the crank case, those are the front engine mounts for this engine. 
Left: Step through style PP cylinder. Right: Tubular frame style PP cylinder. 
 The reason the right cylinder has large holes is because the engine nuts are 3 inches long because of clearance issues with the frame. 
 Tubular frame style Derbi head.  This is one of the 3 inch deep engine nuts for holding the head and cylinder on.  Dont lose these!!!!! Important!!! Notice the large holes for the large nut. 
 Traditional step through frame style PP head. <--- long title. Regular sized holes for engine studs. 

So if you have a random Derbi engine or are doing an engine swap, hopefully this can help you identify you engine or plan ahead for a build. Freaks.

Below is a random Derbi discovery. A stock v1 ring works as the bottom ring on a stock Derbi piston.  Who knew?!

Thursday, February 27, 2014

Which shims go where inside a Derbi Piston Port Engine.

So as I keep rebuilding engines, I have noticed that I have been relying less on manuals and more on just what I see. So I'm doing a rebuild on a Derbi piston port engine for my TAT Derbi. I picked up a trashy yellow 1979 Derbi T.T. (stands for Tough Terrain :D) off Charley from BLK BLK. It's pretty crusty but its actually in better condition than I expected. Plus a little trashy is rad so I wont feel bad if I weld all over it. 

 So we all know what it is like to take an engine apart, leave it sitting for a month and then forgetting where everything goes.... Then looking at the manual and pictures that contradict what you are seeing. I find that engine repair manuals can be confusing and I'm personally a hands on learner.  There is nothing better than an unmolested complete bike to take apart and put back together. So I documented where all the shims go in this engine because I've noticed some discrepancies in the manual. Also this was a FUNNY wrenching session because I recently moved and don't have a work bench yet. Man it brought back early rebuild memories of oblong greasy engines rolling around every time I touched them.Keep in mind this is just to show the shims and Im going to clean everything up a TON. FYI The manual I am using is from 1979 which is the same year of the bike that I am taking apart. 

First lets take a look at a few images from the manual. These look like they were taken with a Logitech Beta webcam and are -2 megapixels, they really dont help at all. 

Oh yea! Let me zoom in there and see that at 300% a shim looks like a lego. 
So I'm here for the boat anchor party.
Not bad inside...
Needle bearing and washer/spacer for the rear varo shaft.
Hard to see but the washer/spacer is tapered and the smaller side goes down into the shaft.
Both in place.
Little rusty.
These 2 washers come off right side of the main gear on the pedal shaft.  One is a bit (~1mm) larger around and 1mm smaller in thickness than the other. The larger one measured 33mm OD x 16.2mm ID x  2mm thick and the other one measured 32.3mm OD x 16.2mm ID x 3mm thick. This is where I noticed one of the discrepancies in the manual.  

As you can see, the two shims I listed above are shown as one shim (#37) and is listed (below) as 32.3mm OD x 16.2mm ID which is the right measurement. Another few weird things with this diagram is that the needle bearings and spacer listed as #34 and #35 are in my engine just one big needle bearing. Lastly if you look a few pictures down from here, there is a photo of the shim on the left of the main gear that rides on the pedal shaft. Its in the above diagram listed as #33 I measured it and it is the exact same as #37 shim (32.3mm OD x 16.2mm ID x 3mm thick) but in the list below, it is listed as 19.2mm x 32.3mm. That doesn't make sense because if it rides on the same shaft as the other bearings it should be listed as a 16.2mm ID and not 19.2mm ID. 

Actually a few pages later in the manual it lists some of the shims from above that measured 25mm OD x 16.2mm ID x 3mm thick as being 26.1mm OD x 19.2mm ID x 1mm. Doest make sense how the manual keeps listing the ID of washers that ride on the 16mm pedal shaft as 19.2mm. 


This is the #33 misprinted "19.2mm ID" shim which is really 16.2mm ID.

These 2 shims are 25mm OD x 16.2mm ID x 1mm thick. Listed in the manual (#26) as 26.1mm OD x 16.2mm ID but hey it's close enough. 
If you have ever rebuilt a Derbi PP engine you know that removing the "shifting dog" is the fun part. LOOK OUT FOR FLYING BBs!
Tap tap tap.

This furthest left shim on the pedal shaft measured 22mm OD x 16.2 ID x 1mm. Below it is listed as #8 the "righthand pedal washer" but once again wrong spec listed as 19.2mm ID. 


One last thing I thought was strange is the poor quality of the main gear in this engine. I mean look at that... Cmon Derbi!!! Everything else looks great though and the crank will probably work just fine one it's cleaned up.

Monday, February 17, 2014

My RIPPIN' Photoset.

My friend Rebecca Dreyfus came up with a rad photo projects a while back. The idea was to give mopedders from all over the States a disposable 35mm camera so they could take pictures of their own moped lifestyle. She features people from all over and its real rad! My camera took me a few months to complete and I added captions. Also check her website http://rippin.me/. 

Green Bay JTT4 - Matt Chedda.
 Green Bay JTT4 - Me and Azzy.
 Green Bay JTT4 - Becca.
  Green Bay JTT4 - Campsite.
  Green Bay JTT4 - From our tent.
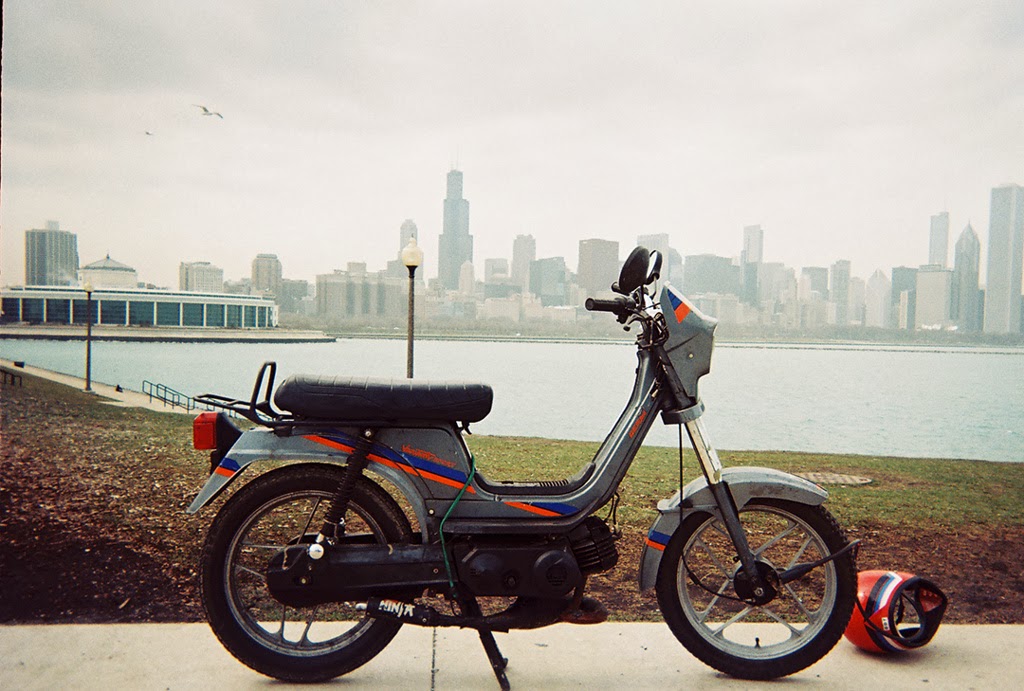
 Chicago skyline.
Chicago - Peddy Ca$h rally Blk Blk Hotel room.
 Chicago - Bridgeport Coffee run with my dude Thom.
 Chicgo - Logan Lions rally.
 Chicago - Castle shop.
 Nashville - Dead Peds Campsite.
 Nashville - Loaded up with peds.
 Illinois - Amtrak to see my girlfriend.
 Chicago - Observatory.
 Chicago - Castle Hobbit mess.
 Chicago - M.O.P.E.D. Benelli plant.
 Chicago - M.O.P.E.D. Will in the dark.
 Chicago - M.O.P.E.D.
 Chicago - Castle moped roundup.
Chicago - Expired plates and expired movies.